
Last updated November 16, 2026
 Architectural shingles
 Metal roofing
 Tile roofing
 GAF
 Owens Corning
 Flat & low-slope
Free roof inspection with deck photos before we talk money - GAF and Owens Corning certified installation
Roof Repair Maintenance Checklist for Fremont Homeowners
The two maintenance moments that cause the most preventable roof damage in Fremont don’t happen after a storm. They happen in late October, when the first real rain lands on a roof that’s been baking since May, and again in April, when a whole winter’s worth of deferred problems sits hidden under dry, sunny skies that make everything look fine. Most checklists tell you to look for missing shingles and call it a day. That advice was written for a climate that isn’t ours. This guide is built around the failure patterns Fremont roofs actually develop, sequenced by the calendar events that trigger them. You’ll learn what to check and when, how to document it properly, which tasks are safe to handle yourself, and which ones quietly void a manufacturer warranty if you don’t call a licensed roofer.
Quick Answer
A sound roof maintenance routine in Fremont centers on two anchor points: a pre-rainy-season inspection in October that focuses on valley flashing, flat-roof drains, and penetration sealant, and a post-dry-season check in April that catches thermal cracking and brittleness left by months of inland heat. Attic-side checks, photo documentation, and a clear line between safe DIY tasks and warranty-voiding work fill the gap between them.
Styles & brands we work with
- Architectural shingles
- Metal roofing
- Tile roofing
- GAF
- Owens Corning
- Flat & low-slope
Table of Contents
- Why Fremont Roofs Fail on a Calendar, Not a Season
- The October Pre-Rain Checklist
- The April Post-Dry-Season Checklist
- Reading Your Attic Like a Leak Detector
- How to Document Your Roof for Insurance
- DIY Maintenance vs. Warranty-Voiding Work
- Flat and Low-Slope Roofs: The Fremont Reality
- Building Your Annual Maintenance Schedule
Why Fremont Roofs Fail on a Calendar, Not a Season
Fremont doesn’t have a roofing season the way colder parts of the country do. It has a dry stretch and a wet stretch, and the transition between them is where most damage gets decided. A roof that’s been sitting in inland heat since spring has had months of thermal expansion and UV exposure. Sealants soften, cure, and shrink. Asphalt cap sheets on low-slope sections dry out and lose flexibility. Then the first sustained rain arrives, and every small gap that opened up over the summer becomes a water path.
The reverse is just as true. Once the rain stops, the sun comes back and dries the surface within days. A failed valley flashing or a cracked pipe boot can look completely normal from the ground in April, because the evidence dries up fast. The leak only announces itself months later, usually on a ceiling, usually after more damage has accumulated than the original repair would have cost.
That’s the reasoning behind a calendar-driven checklist. You’re not chasing weather. You’re working ahead of the two moments each year when the gap between what a roof looks like and what it’s actually doing is widest.
- October: inspect before water arrives, while the evidence of summer wear is still fresh and visible.
- April: inspect after water has left, while the memory of winter is still recent and hidden damage hasn’t fully dried away.
- In between: attic checks and photo records that catch the slow stuff neither inspection sees.
Everything below fits into that frame. If you only do two things all year, do the October and April inspections. If you want to go further, the attic and documentation sections are where most homeowners in Fremont get the most return.
The October Pre-Rain Checklist
October is the single most productive inspection window in Fremont. Rain is coming, but it hasn’t arrived. Anything you fix now gets fixed before it becomes a water problem. Here’s the sequence we recommend, working from the ground up.
- Walk the perimeter from a distance. Stand back far enough to see the whole roof plane. Look for lines that sag, areas that look different in color, and anything that catches the eye. Close-up walks hide big problems; distance reveals them.
- Check the valleys. Valleys are where two roof planes meet and where more water concentrates than anywhere else. After a hot summer, valley flashing can lift slightly or collect debris that hasn’t moved. Look for granule accumulation in the valley (a sign of wear upslope) and any visible lifting at the edges.
- Clear flat-roof drains and scuppers. Low-slope sections on Fremont homes rely on drains and scuppers to move water, not slope alone. A drain packed with leaves and grit from summer is a pond waiting to happen. Clear them before the first rain, not after.
- Inspect every penetration. Pipe boots, vents, skylight curbs, and any HVAC penetration have sealant around them. Check that the sealant is still pliable rather than cracked or separated. If you can press a fingernail into it and it gives, it’s still working. If it’s brittle or gaping, it needs attention.
- Look at the pipe boots themselves. Rubber boots crack with UV exposure. A cracked boot on a plumbing vent is one of the most common sources of a slow ceiling stain in the fall.
- Check gutters and downspouts. Clean them before the first rain and confirm downspouts discharge away from the foundation rather than pooling against it.
- Look for lifted or missing shingles. Wind events happen year-round. A lifted shingle or two now is a small repair. After a wet winter, it’s a deck issue.
If any of these turn up something you don’t want to assess yourself, that’s the point at which roof repair becomes a conversation rather than a guess. Getting an honest scope in October costs you nothing extra and usually prevents a much larger job in January.
The April Post-Dry-Season Checklist
April looks easier than October, and that’s exactly what makes it dangerous. The surface has dried. The sun is out. Everything appears fine. The problems that formed during the wet stretch have gone quiet, and the ones that formed during the hot stretch haven’t announced themselves yet. But this is the window where deferred winter damage is most repairable, before the next dry season locks it in.
- Look for thermal cracking on cap sheets. On low-slope and flat sections, the cap sheet is the top layer of the roofing material, and inland heat causes it to crack along natural lines. Small cracks now become larger ones by August. Note where they are and how long they look.
- Check sealant at every penetration again. Sealant brittleness is cumulative. The sealant that survived October may have cured-out over the winter. Recheck it the same way, press-test, look for cracking and separation.
- Look for granule loss. Granules on shingles are the sacrificial layer against UV. You can’t add them back, so what you’re checking is the rate. A shingle losing granules evenly across a whole plane is aging. One losing granules in a concentrated area has a localized problem above it.
- Check the attic on a sunny afternoon. The attic section below explains this in detail, but April is one of the two best times to do it. Sun-driven heat pushes vapor and any active moisture into visible patterns.
- Confirm flashing hasn’t shifted. Wind and thermal movement can lift step flashing at sidewalls and chimney intersections. Small lifts from the winter are easier to catch now than mid-summer.
- Re-photograph everything. If you documented in October, matching the same angles in April tells you what changed. That comparison is gold if an insurance conversation ever comes up.
The April inspection is not about finding catastrophe. It’s about catching the small, specific things that are still small and specific. A cracked cap sheet seal, a slightly separated step flashing, a boot that survived the winter but is on borrowed time: these are all cheap repairs in April and expensive ones if they go a full cycle. When a seam or penetration needs addressing, a targeted fix is often the right call, and a licensed roofer should tell you so rather than steering you toward a full roof replacement you don’t need yet.
Reading Your Attic Like a Leak Detector
Your attic tells you about leaks before your ceiling does, sometimes months before. The trick is knowing how to read it. Most attic indicators are pattern-based, not obvious water damage, so once you know the patterns, they’re reliable.
How to read insulation staining
Look at the insulation at the edges of the attic floor, near the eaves and around penetrations. Fresh water leaves a distinctly darker, flatter-looking ring. Old, dried water leaves a faint brown or gray tide line that can look almost like regular dirt. If you can see a bright ring, the water is active. If you can see a dark, defined tide line with nothing bright inside it, the water was active but has dried. In either case, note the location precisely and the shape. A ring around a pipe means a pipe boot or flashing issue. A ring along a top plate means a wall flashing or wind-driven water issue. A dark patch in the middle of a field of insulation means you need to look up.
Other attic indicators
- Daylight through the roof deck. Any visible daylight between boards or in a valley is a water path waiting for rain.
- Rust or corrosion on nails. Roofing nails protruding through the deck that have rusted or corroded indicate moisture. Fresh rust on a nail means active moisture.
- Wood discoloration at rafters or sheathing. Dark streaks or staining on the structural wood indicates water that reached the deck.
- Mold or mildew smell. A musty smell in the attic after a wet stretch is a moisture signal, even without a visible leak.
- Standing water on the deck in flat sections. Any visible water on the top side of the deck from inside is a drain or flashing failure.
Do these checks mid-morning to mid-afternoon. Morning fog and residual overnight moisture in Fremont can mimic active leaks. Dry, sunny conditions are when the true picture reads clearest. If you find anything bright or active, get someone licensed to look before the evidence dries up.
How to Document Your Roof for Insurance
Photos are the difference between an insurance conversation that goes well and one that becomes an argument. Most insurer disputes don’t come from bad faith on either side, they come from missing or unclear records. The homeowner who can produce a clear visual timeline is in a much better position than the homeowner who says “I think it happened during that storm.”
Here’s how to document in a way that actually helps:
- Timestamp every photo. Use the camera’s timestamp, don’t rely on memory. Photos without dates are much weaker evidence.
- Establish reference points. Include a wide shot of the whole roof plane, then medium shots of each quadrant, then close-ups of the specific issue. The wide shot establishes where you are on the house. The close-up shows what’s happening.
- Get a “context shot” with a fixed landmark. For every close-up, include a slightly wider frame that includes a permanent feature: a chimney, a vent stack, a downspout, a skylight. Insurers need to know exactly where the damage is, not just what it looks like.
- Photograph the attic indicator too. If you find staining or a bright ring in the attic, take the attic photo and the roof photo of the same location. Matching the two tells the adjuster a complete story.
- Shoot from multiple angles. Two photos of the same damage from different positions is far better than one. Insurers are trained to look for consistency.
- Document the date and the reason. A brief note alongside each set, “October pre-rain inspection, valley flashing at back plane,” turns a photo dump into a record.
- Keep a simple log. One line per inspection, one set of photos per event. A roof log that spans two or three years is much more useful than a single inspection record.
If you’d rather not climb, a professional inspection can produce the same record. A standalone inspection is not the same as a sales visit, and it shouldn’t be treated as one. If you’re looking for an inspection-first approach where the report is the deliverable, that’s what Denali Roof Repair offers as a separate service.
DIY Maintenance vs. Warranty-Voiding Work
A lot of roof maintenance is safe and worth doing yourself. Some of it isn’t, and part of that second group will actually void a manufacturer warranty if you touch it wrong. Understanding the line matters, because a warranty is only as good as the conditions it’s held to.
Safe DIY tasks
- Clearing flat-roof drains and scuppers by hand, from a safe position.
- Cleaning gutters and confirming downspouts discharge away from the house.
- Photographing the roof from the ground or from a window, with a zoom lens.
- Attic inspection.
- Recording a log of inspections and any changes.
Tasks that should be done by a licensed roofer
- Any work that involves lifting existing shingles. Shingles are interlocked and sealed. Once you break them apart, you need to reseal them correctly, and the sealant you’d use is a specific product, not just any adhesive.
- Sealant application on a warranted roof. CertainTeed, Owens Corning, IKO, and Atlas each publish installation and repair standards their warranties depend on. A sealant that isn’t approved, or an application method that doesn’t match their standard, can void the warranty on that section.
- Flashing or valley work. Flashing is not just metal bent into a shape. It’s set in a specific order relative to the shingles or membrane, and getting the order wrong causes water to go under rather than over. This is where a “small” repair often turns into a leak.
- Pipe boot replacement. Sounds simple, but the boot must be installed with the correct collar seating and correct lap with the shingle course above. A boot that’s installed but laps wrong is worse than the old boot.
- Any work on low-slope or flat membrane. Seams on flat roofs need a specific weld or bonding method. A DIY patch is likely to fail at the next seam and may void the manufacturer warranty on the section.
- Anything requiring you to walk a steep slope or height. This is not a maintenance task, it’s a hazard. Get someone licensed who carries insurance for it.
How to know when you’ve crossed the line
If the task involves lifting existing roof material, sealing at a seam or penetration, or applying any product to the roof surface, it’s worth a call. The cost of a legitimate repair is far lower than the cost of a voided warranty on the section when the next failure happens. If the task is visual (looking, photographing, clearing) you’re almost always in safe territory.
Flat and Low-Slope Roofs: The Fremont Reality
Many homes in Fremont have some low-slope or flat square footage, whether it’s a main roof, a garage roof, a section over an addition, or a porch cover. Low-slope roofs behave very differently from pitched roofs, and the maintenance checklist for them is closer to what you’d do on a commercial building than on a house.
Where a shingle roof relies on slope and gravity, a flat roof relies on drains, scuppers, and the integrity of seams. That means:
- Drains are the primary safety system. A clear drain is a working roof. A clogged drain is a pond. Check drains more often than you think you need to, especially in October and again after the first serious rain of the year to catch anything that slipped through.
- Seams are where failures start. Seams run along the field and up wall terminations. Look for lifting, separation, or “tenting” at the seam, which is what a failing bond looks like from the surface.
- Cap sheets have a thermal lifespan. The top layer on low-slope membrane aging through inland heat will eventually crack. Catching the crack when it’s short and narrow is much cheaper than catching it after a full rainy season has pushed water under the cap sheet.
- Flashings at wall terminations need recheck. The base of a wall meeting a flat roof is a high-risk spot for water intrusion, particularly if the counter-flashing isn’t fully seated.
Low-slope roof repair is one of the areas where we’ve seen the most damage come from well-intentioned DIY work. A membrane is a system, and the pieces need to interact the way the installation standard says. This is genuinely worth calling a licensed professional over.
Building Your Annual Maintenance Schedule
The checklist only works if it becomes habit. Here’s a simple calendar you can keep on your phone or in a shared note.
- Mid-October: full pre-rain checklist. Ten minutes on a ladder if it’s safe, a walk around the perimeter at minimum. Clear drains and gutters.
- Early-to-mid April: full post-dry-season checklist. Cap-sheet thermal cracking, sealant brittleness, granule wear, attic inspection on a sunny afternoon.
- After any significant wind or rain event: perimeter walk to check for new damage. Look for shingles on the ground or missing tiles.
- Once every three years: full professional inspection on top of your own checks. This is the layer you can’t see from the ground and don’t want to reach yourself.
Everything on this list except the professional inspection costs you time, not money. The professional inspection is the one addition that has the biggest return, because a licensed roofer knows what they’re looking at, knows which failure modes match which materials, and can tell you plainly whether what’s there is a repair, a replacement, or nothing at all. If you’re going to be in a Fremont home for the next several years, at least one legitimate professional inspection on the roof’s record is worth the appointment. If you’re not sure where to start, a call to arrange an inspection in Fremont is usually the easiest way to get a clear picture.
Common Mistakes to Avoid
- Inspecting only after a storm. By the time a storm hits, the small openings have already become active leaks. The most important inspections happen before the rain, not after.
- Doing an April inspection in the middle of the morning fog. Residual moisture from overnight can make a dry roof look wet and hide the real evidence. Wait for a clear afternoon.
- Climbing a steep roof to “check” it. The most dangerous part of roof maintenance is the access. There’s no maintenance task worth a fall. Use binoculars from the ground, or call someone.
- Applying the wrong sealant to a warranted roof. Sealant type matters. A product that isn’t on the manufacturer’s approved list can void a section of warranty in a way that’s hard to walk back.
- Skipping the attic. Most homeowners never go in the attic during the dry months, which is where the read is clearest. Attic checks in April and October catch leaks the roof surface hides.
- Treating a professional inspection as a sales visit. It should be a report first. If a contractor walks up, looks around, and gives you a $20,000 replacement quote before a written scope and report, that’s a signal to ask more questions.
- Not keeping records. Photos without timestamps and location notes are much less useful than they could be. Ten seconds of labeling saves a lot of argument later.
See the difference
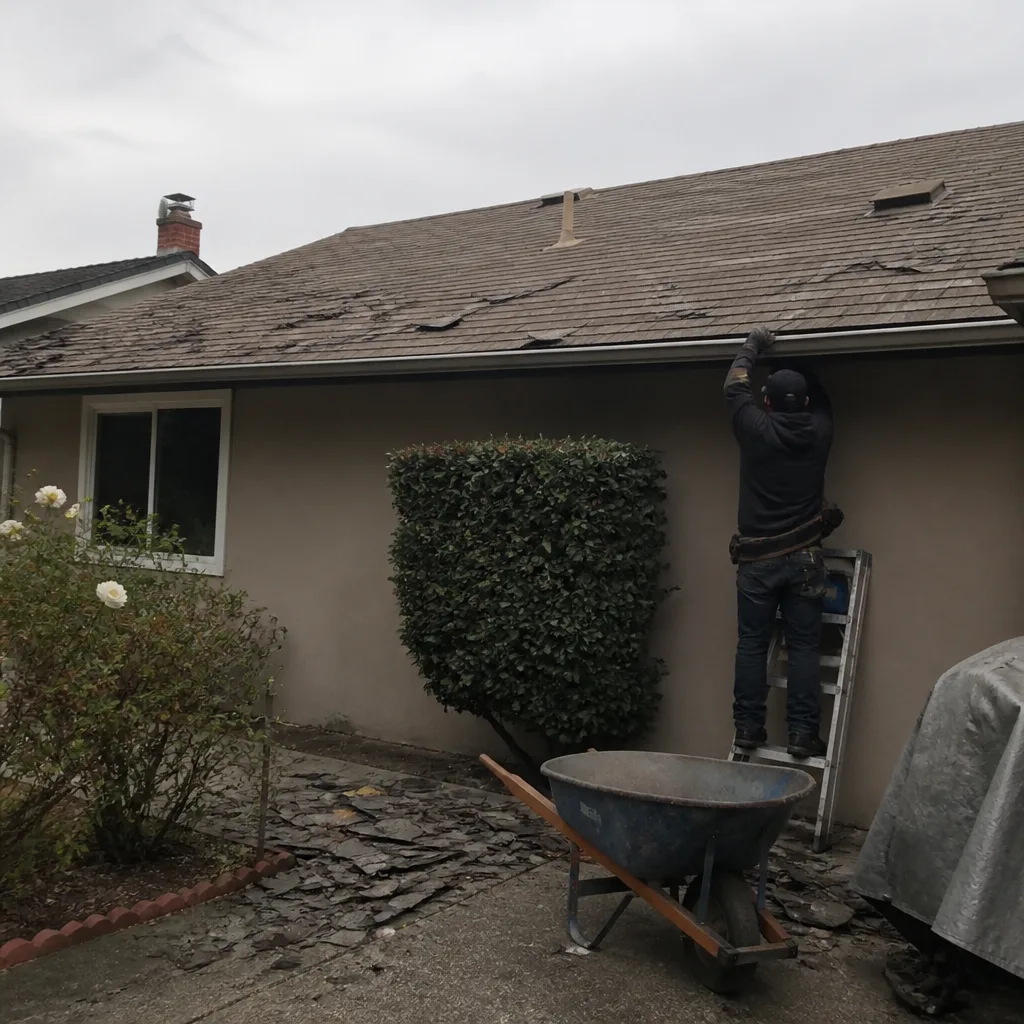 Before
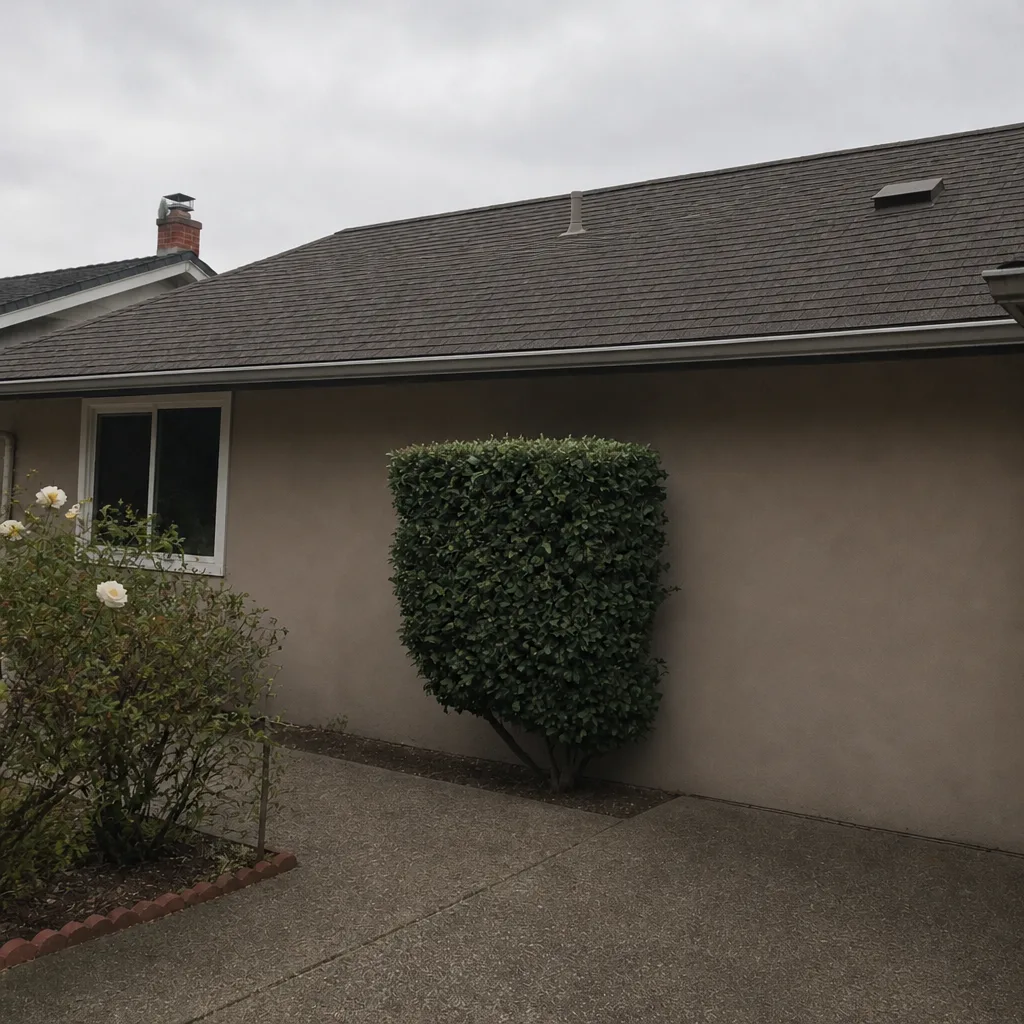 After
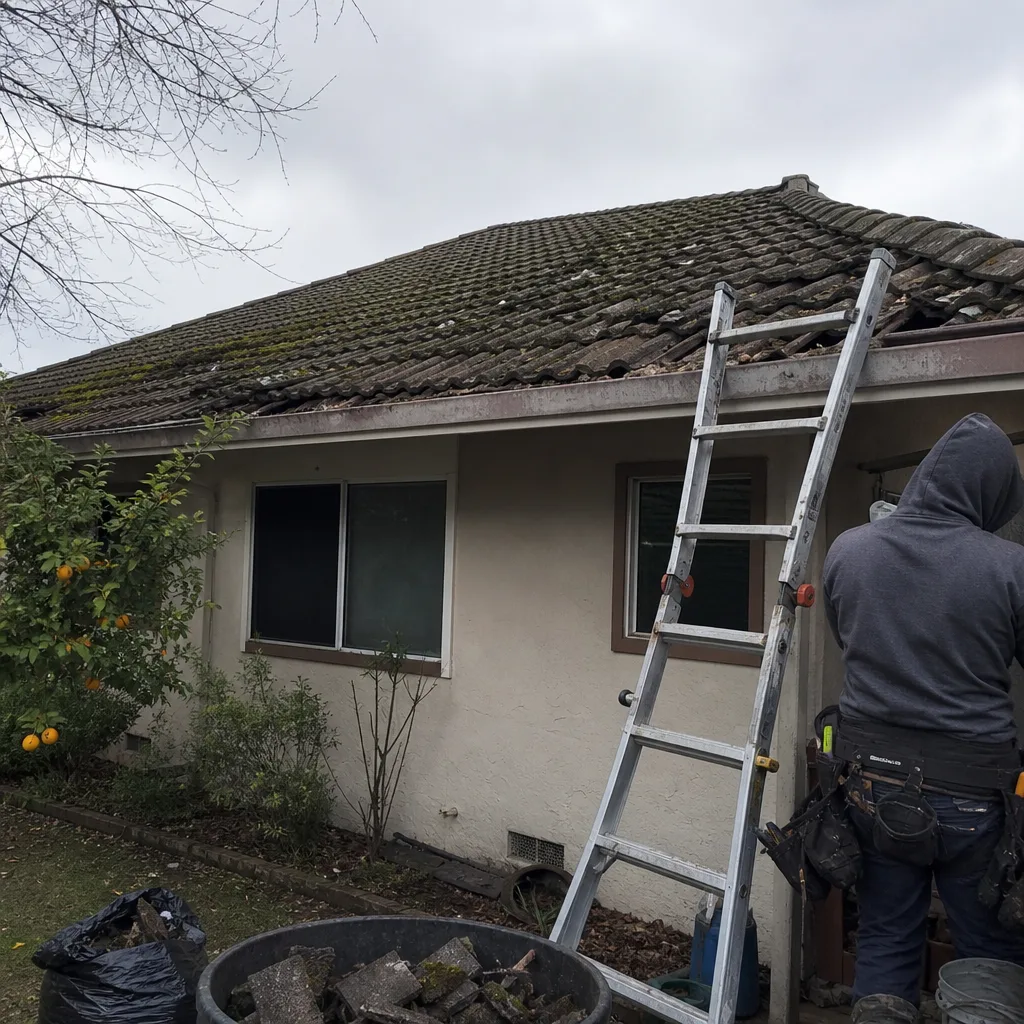 Before
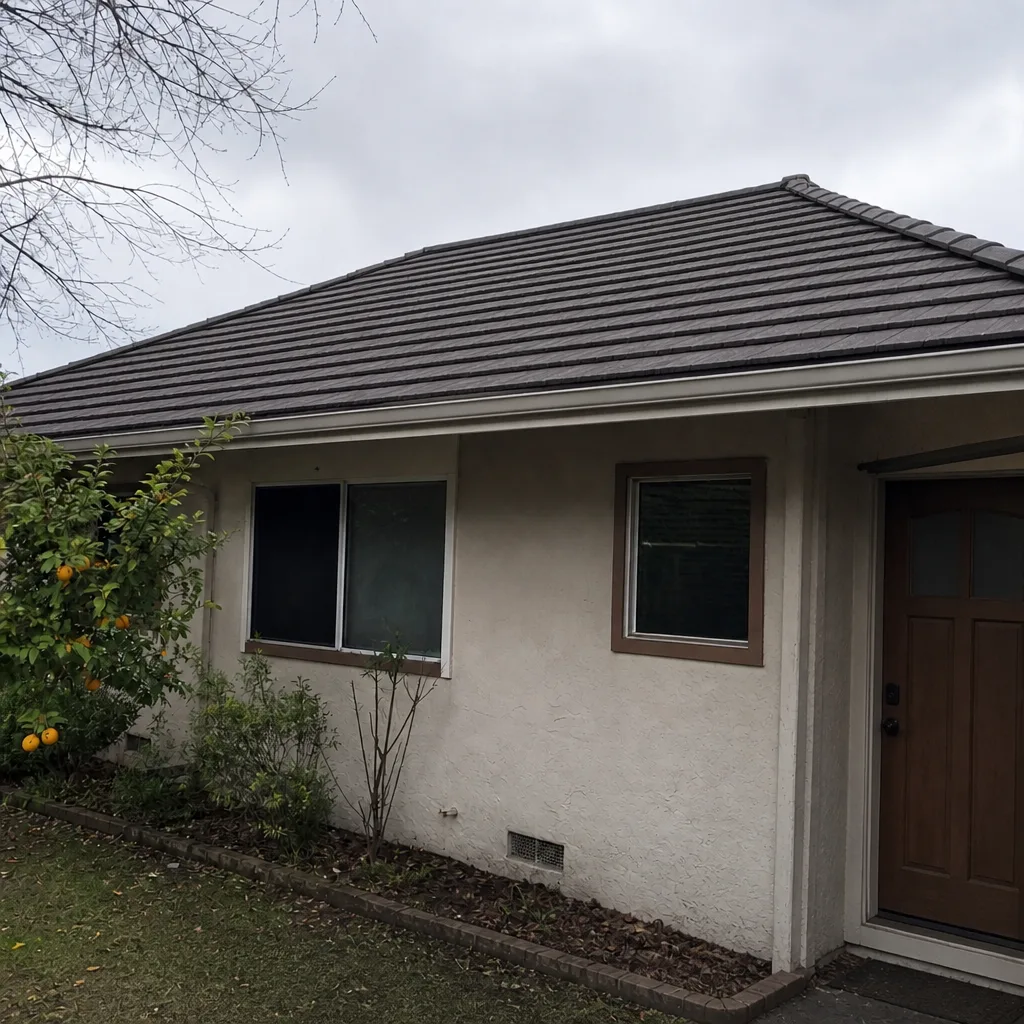 After
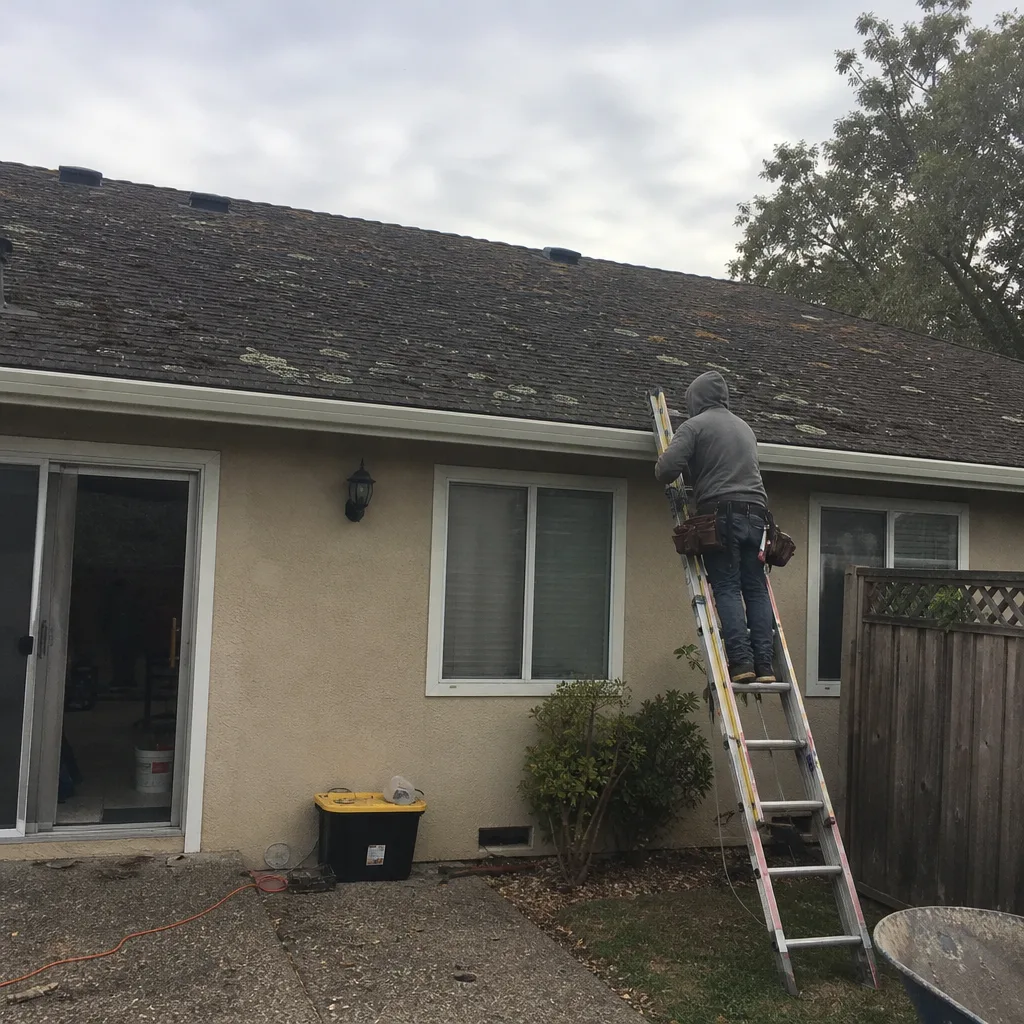 Before
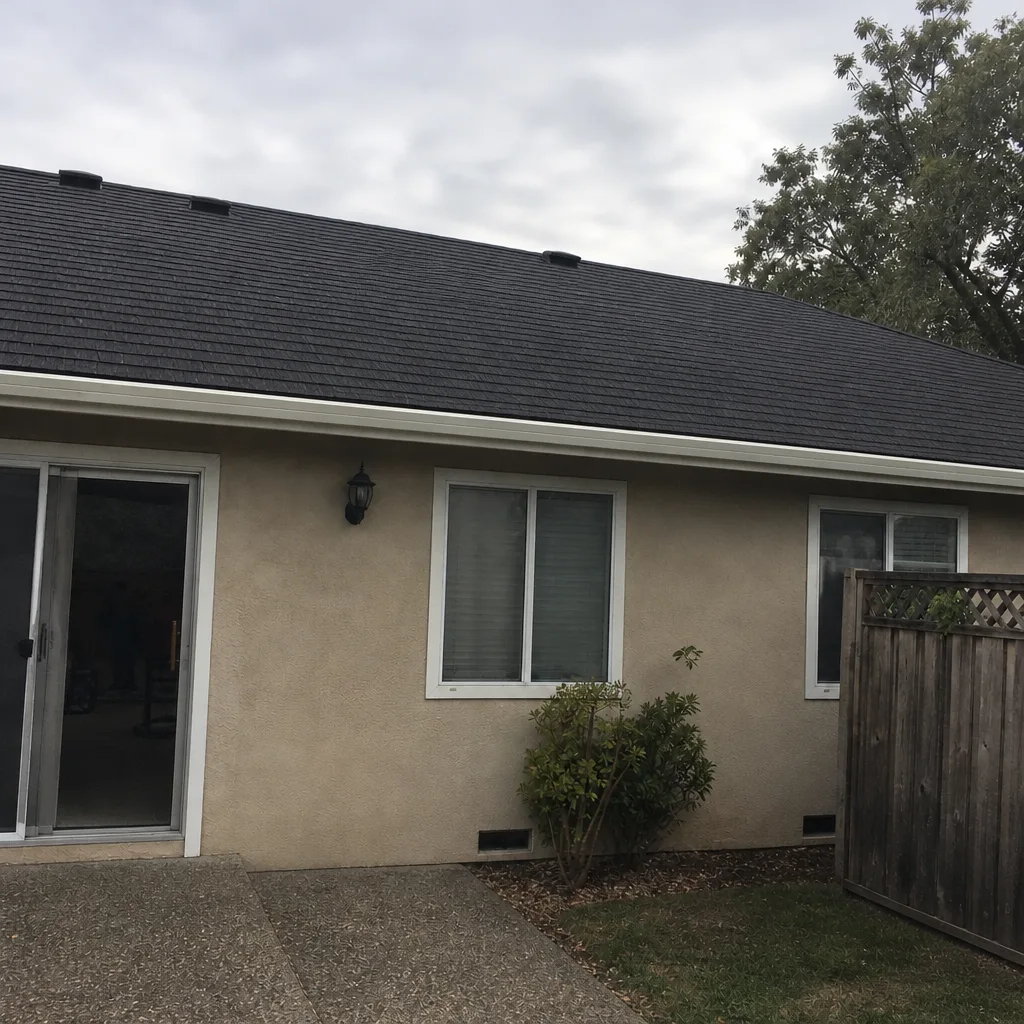 After
When to Call a Professional
Some things are clear calls. If you see daylight through the roof deck from the attic, that’s a call. If a stain appears on the ceiling or a wall, that’s a call. If you see a visible ring in the insulation in the attic that wasn’t there before, that’s a call. If any flat-roof seam is lifting or tenting, that’s a call. If the roof is more than a few years old and you’ve never had a professional inspection, that’s a call too, even without a symptom.
The harder ones are the “it looks fine but I’m not sure” moments. If you’re unsure about the sealant at a penetration, the granule wear on a cap sheet, or the pace of shingle aging, an inspection is usually the right answer. The inspection is not a sales pitch in disguise; it’s a genuine look at what’s happening. Our technicians have up to 13 years of experience reading exactly these conditions, and one of our core principles is repair when repair is right, replace when replace is right. Denali Roof Repair offers free estimates in Fremont. Call (833) 449-5604 to schedule your inspection.
We answer 24/7. Fast dispatch from 7am to 7pm, Sunday through Friday.
Frequently Asked Questions
Twice a year is the right baseline: once in October before the rainy season and once in April after the dry stretch. Between those, do a short walk-around after any significant wind or rain event. Add a full professional inspection once every three years on top of your own checks.
For pitched roofs, the biggest signs are granule accumulation in valleys, lifted shingles, and sealant that no longer presses back. For flat and low-slope roofs, capped drains, cracking along the cap sheet, and lifting at seams. From the attic, bright rings in the insulation, rust on protruding nails, and any visible daylight through the deck. Call (833) 449-5604 for an exact assessment; estimates are free.
No. Power washing damages asphalt shingles, strips granules, and drives water under them. It’s also usually a warranty violation. If a roof needs cleaning, it needs gentle methods that don’t compromise the material, and that’s a professional conversation.
Only if it’s done incorrectly or with unapproved materials. A properly done repair by a licensed roofer using approved materials preserves the warranty on the section. A DIY repair using an unapproved sealant, or work that lifts sheets without resealing them to the manufacturer’s standard, can affect the warranty. Ask before you touch anything you’re not sure about, and call (833) 449-5604 if the answer isn’t clear.
A homeowner-level visual check takes ten to twenty minutes on the ground and from the attic. A full professional inspection takes longer, usually one to two hours depending on the size and complexity of the roof. The difference is depth, not speed. A professional inspection includes checking conditions you can’t safely reach yourself.
Put a bucket under it, photograph it with a timestamp, and call for a professional assessment. Don’t try to patch the roof in the rain, and don’t climb out in wet conditions. Call (833) 449-5604 and we’ll get you booked into the next opening. We answer 24/7. A call outside dispatch hours is booked into the next opening, Sunday through Friday, 7am to 7pm.
The Bottom Line
Fremont roofs don’t fail in the middle of a storm. They fail in the space between what a roof looks like and what it’s actually doing, and that space is widest in late October and again in April. Sequence your maintenance to those two moments. Do the attic checks and photo documentation in between. Protect your warranty by drawing a clear line between safe visual tasks and work that belongs to a licensed roofer. Everything here is doable, most of it costs only time, and the payoff is years of extra service from the roof you already have. If a licensed set of eyes on the roof would help, call us for a free estimate. We’d rather tell you a repair will do than sell you a replacement you don’t need.
Call (833) 449-5604 to schedule your free estimate.
Written by the team at Denali Roof Repair.